Electronic Remittance
The Electronic Remittance screen can be used to download an electronic file, obtain remittance reports, or perform Medicare specific remittance.
To open the Electronic Remittance screen, click Remittance. (Main Menu > Billing > Remittance).
Parts of the Remittance Screen
General
The General section of the Remittance screen contains the fields for export file names and dates.
Field | Description |
|---|---|
File | Use this field to search by file name. |
Dated | Use this field to search by date. |
Get File | Click this button to download an electronic file. |
Click this button to print the Remittance report. | |
Export | Click this button to export the downloaded electronic file. |
Uploading an Electronic File
Overview
Use the Remittance screen to upload an electronic file sent by an insurance company/payer. The system automatically:
| 1. | Applies the payments to the invoices. |
| 2. | Changes the status of invoices as needed. |
Applies denial codes when available.

Uploading an Electronic Remittance File
To automatically download and process an electronic file:
| Note: To process payer payments, it is necessary to download the file from the payer’s website before proceeding. Please note the location of the saved file before beginning electronic remittance. |

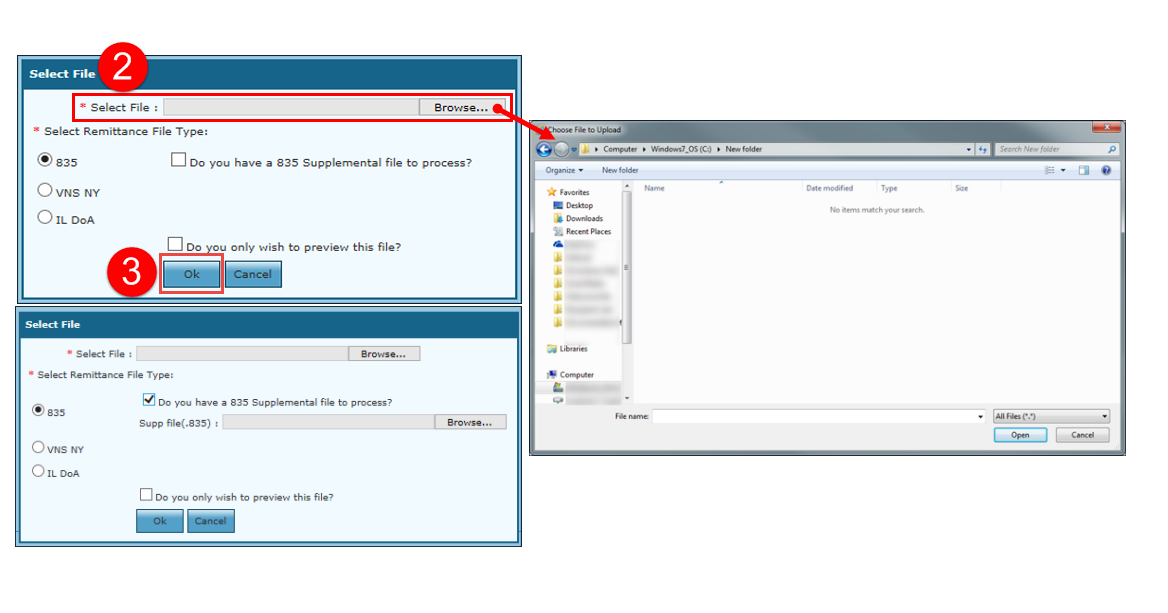
| 1. | Click Get File. |

| 2. | Select file. |
Enter the file path or click on Browse to search for a remittance file to upload.
When using the Browse function, a new window will open. Use this window to locate the file that contains payments to process and click on it to select it. Click on Open to confirm the selection. To import an additional remittance file, select the Do you have a 835 Supplemental file to process check box.
| Note: The Do you have a 835 Supplemental file to process check box is used when there is an additional remit with the same remit ID that must be posted. |
| 3. | Click OK. |
The system begins processing the file and applying the payments.
| Note: Select the Do you only wish to preview this file? check box to preview the report without processing the file. |
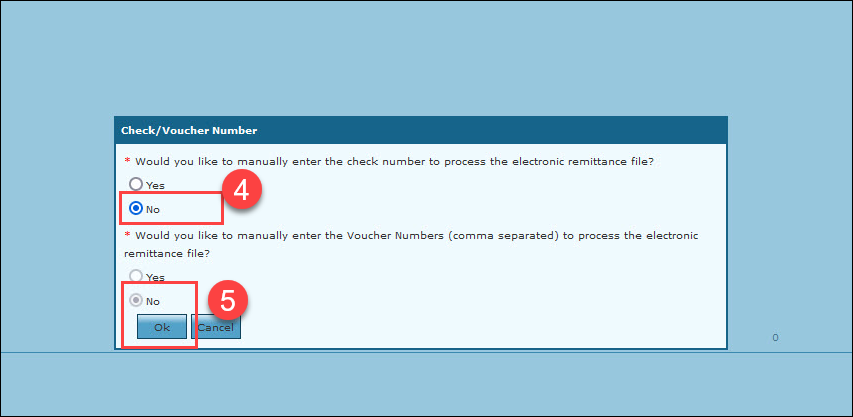
| 4. | Choose the check/voucher number options. |
Unless it is a special circumstance, these should have No selected.
| 5. | Click Ok. |
| 6. | Enter the Deposit date. |
Click Ok.

Reporting
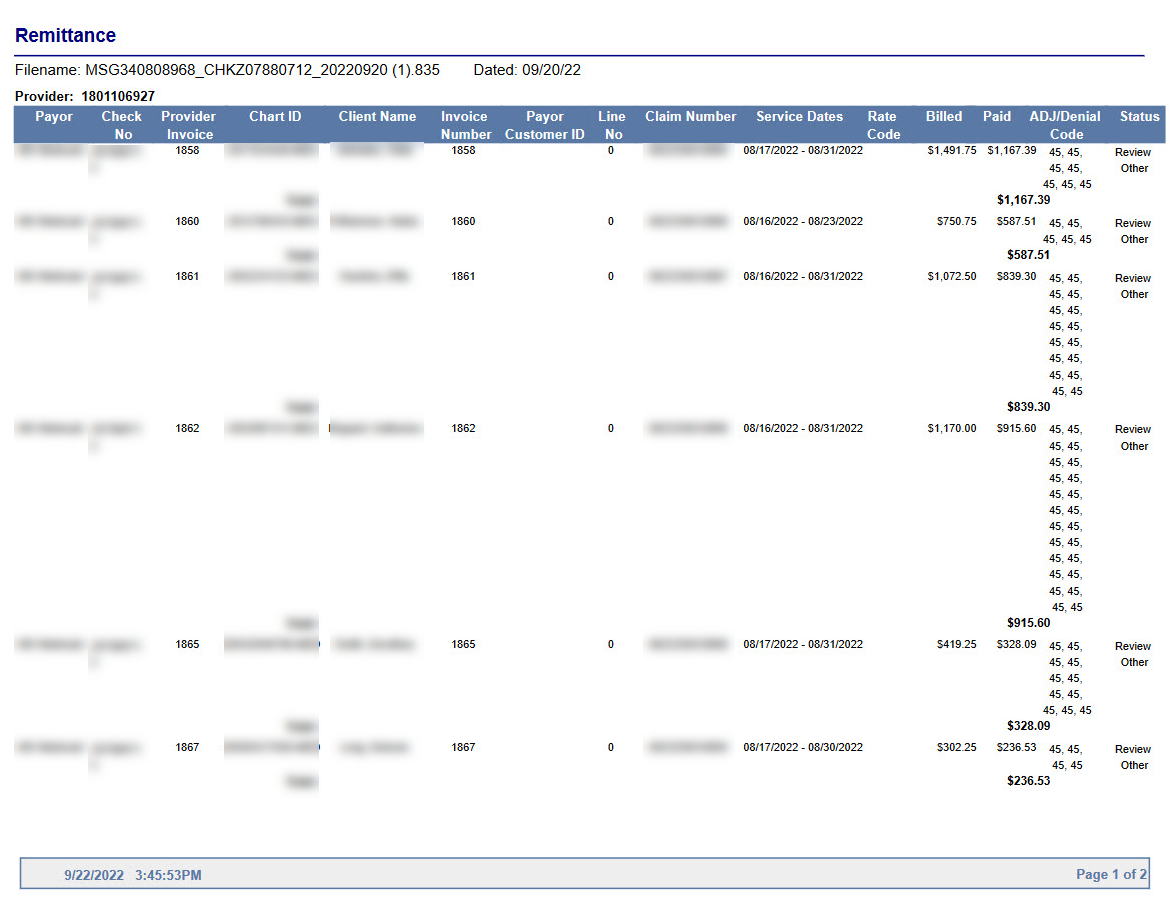
After uploading the remit file but before leaving the screen, the Print button can be clicked to generate a remittance report in PDF form.
Click Export to get the same remittance report in an Excel (CSV) format.

Medicare Specific Remittance
When processing a Request for Advance Payment (RAP), the system applies a 32.2 Initial Payment to the invoice. The status changes to ‘RAP Paid’ and the invoice balance is adjusted to reflect the payment.
When processing the final payment, the system posts a 32.8 Take Back and then 32.9 Final Payment. The status of the invoice changes to ‘Bill Paid’ and the balance will be 0. If there is any difference in the billing amount and the payment, the system automatically posts an adjustment to that invoice based on pre-selected payment code settings.
Comments
0 comments
Please sign in to leave a comment.