Rollback
The Rollback button is used to correct all claims in an Export File when it has been rejected by a payer.
Rollback initiates a process that changes the status of the invoices in the selected export files from 06- Bill Sent to 05- Billable (in the Billing Export screen). This allows these claims to be re-exported. It is used when the provider needs to correct and re-submit claims that have been denied by the Payor.
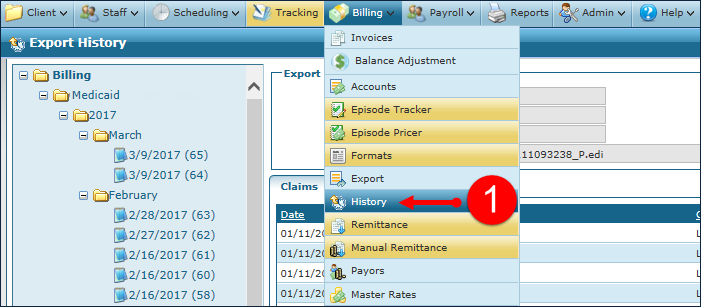
| 1. | Navigate to the Export History screen. |
Main Menu > Billing > History
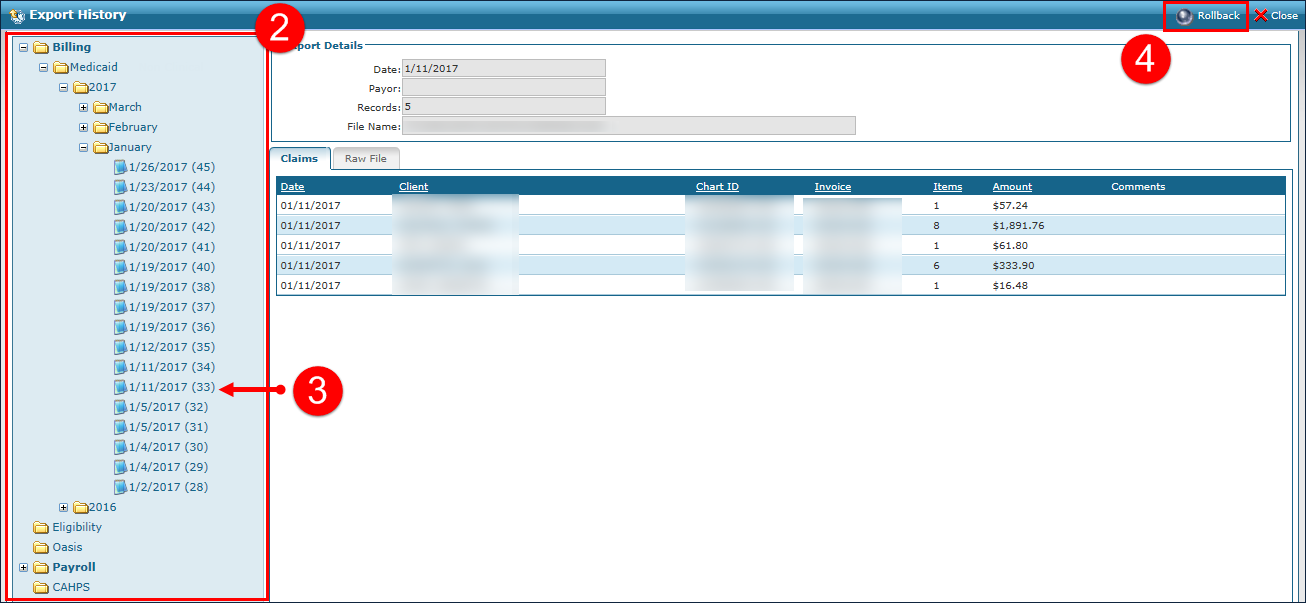
| 2. | Locate the rejected claims in the navigation panel. |
Use the Collapse/Expand toggle, (+/-) next to the folder icons, to locate the rejected claims.
| 3. | Click on the desired file to display the claim’s details. |
| 4. | Click Rollback. |
| 5. | Click Yes to confirm the confirmation pop up. |

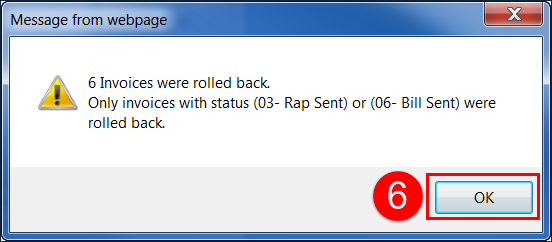
| 6. | Click OK to acknowledge the notification listing the number of invoices and the status changes. |
The related invoices are now set to a Status of 05- Billable and will be part of your next export cycle.
| 7. | Cancel the original invoices and make any required adjustments/visit maintenance from the Schedule Detail screen of the visit(s) related to the claim that has been rolled back. |
| 8. | Generate a new invoice, from the Billing Review screen. |
| 9. | Export the applicable invoice(s), from the Billing Export screen. |
Comments
0 comments
Please sign in to leave a comment.