1. Click the CREATE CLIENT button to open the Create Client screen. (Data Entry > Clients > Create Client)

Create Client
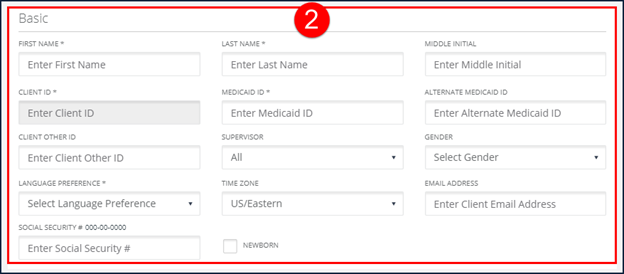
2. Enter all applicable information in the Basic section.
This section is used for all general identifying client information.
Required fields are indicated by an asterisk (*) and can change based on configuration. At a minimum all required fields must be filled in. When available, click ADD to insert the related fields into the table.
|
Note: To prevent duplicate client profiles, search to ensure there is not an existing profile before creating a new client profile. Duplicate client entry is prevented based on the Client ID and/or Medicaid ID. |
Basic Section
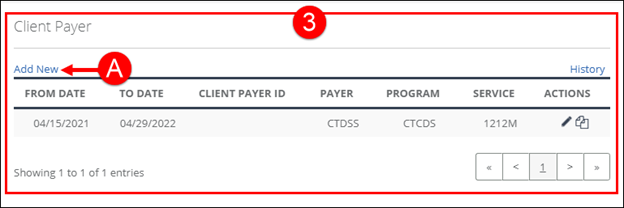
3. Use the Client Payer section to add a payer, program and service, if required.
This section is only available if the account is configured to display it. The Client Payer section allows users to enter multiple payers, programs and services for a client. Use the CLIENT PAYER ID field to create an identifier for that payer. This section allows users to define which services are available for a client. Use the CLIENT PAYER ID field to create an identifier for that payer. This section allows users to define which services are available for a client. START DATES and END DATES for services/payers/programs are also set on this screen. When applying the ‘Invalid Service’ exception, the system checks the parameters defined in this section of the application to determine which visits should be flagged with the exception.
A. Click Add New to open the Add/Edit Payer screen.
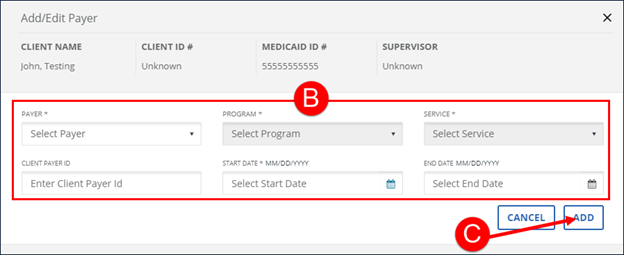
B. Enter all applicable fields.
C. Click ADD.
|
Note: Use the Copy Payer ( |
Client Payer Section
Add/Edit Payer
4. Enter/Select all applicable fields in the Primary Address section.
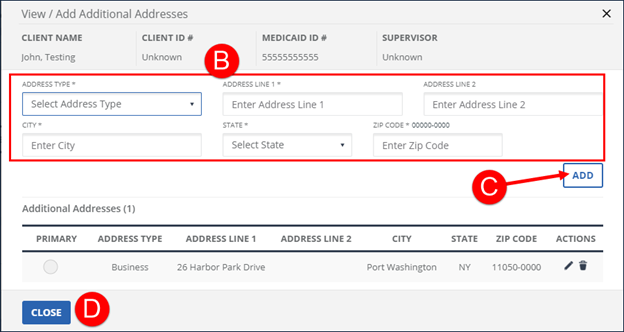
A. Click View/Add Additional Address.
B. Enter/Select all applicable fields in the View / Add Additional Addresses screen.
C. Click ADD and the additional address displays in the Additional Addresses (x) section.
D. Click CLOSE.

Primary Address Section
View / Add Additional Addresses Section
5. Select a PHONE TYPE.
6. Enter a phone number.
7. Click ADD and the phone number displays in the Client phones section.
Phone numbers are used to determine which visits are flagged with certain exceptions (For Example: Invalid Client, Unmatched Client ID, all exceptions related to phone numbers).
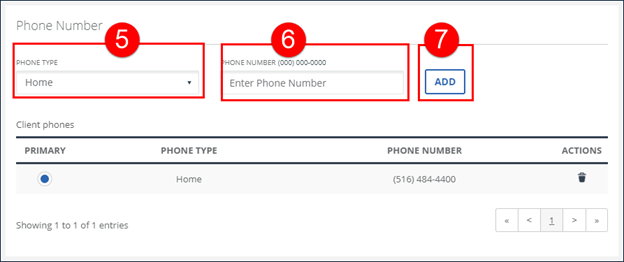
Phone Number
|
Note: The first phone number added is set as the client’s primary phone number. If the client has multiple phone numbers, select the radio button in the PRIMARY column to set that number as primary. |
|
Note: If data is provided by a payer, the primary phone number is not editable and can only be updated by the payer. |
8. Enter all applicable fields in the Emergency Contact section.
An emergency contact is the designated contact person and/or signer for the client. Emergency contacts are also able to provide visit verification on both SMC and TVV visits. Emergency contacts can also log into portal, in place of the client, in certain configurations such as consumer directed services.

Emergency Contact Section
9. Click SAVE.

Save Button
10. Click OK on the Save Confirmation popup.
A notification of confirmation or error displays at the top of the screen. After creating a client, the newly created client profile displays, allowing users to review the information and immediately make updates.
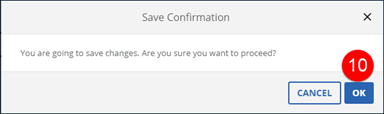

Save Confirmation and Confirmation/Error Notification
|
Note: After saving a client profile, the Edit Client screen displays. If configured, users can now use the REQUEST MOBILE DEVICE button to requiest a mobile visit verification device for the client. |
|
Note: Use the CREATE CLIENT button at the top of the Edit Client screen to create clients consecutively without returning to the Clients screen. |
Comments
0 comments
Please sign in to leave a comment.