Posting Payments/Batches Using Manual Remittance
To post payments:
| 1. | Navigate to the Manual Remittance screen. |
Main Menu > Billing > Manual Remittance
| 2. | Fill in/Select the fields in the Batch Options section. |
| A. | Make sure selections in the Apply As and Batch Type fields reflect the type of transactions being entered. |
Please note, the Batch Number, Batch Balance, and Checks filters do not need to be selected, they auto populate.
| B. | When posting a batch payment, the Batch Total must reflect the correct sum of all the payments being applied. |

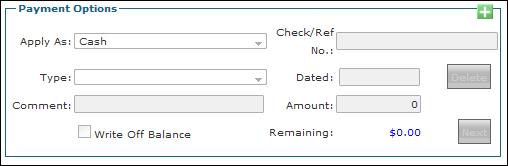
| 4. | Fill in/Select the filters in the Payment Options section. |
| C. | When posting batch payments, each check included in the batch is individually entered in this section. |
| D. | Several fields in the Payment Options section also auto populate based on the Batch Options filters selected. |
| E. | The total of all payments in the batch must match the amount in the Batch Total in the Batch Options section. The Amount in Payment Options can be all or part of the batch total, when entering multiple checks. |
| 5. | Fill in the fields in the Invoice Filters, Invoice Date Range or Service Date Range sections to search for the invoice(s)/line item(s) the payment is being applied to. |
| F. | Payor is a required field. |
| G. | When applying a batch payment, the entire amount of the selected payer’s remittance total amount must be applied before moving on to another payer. |

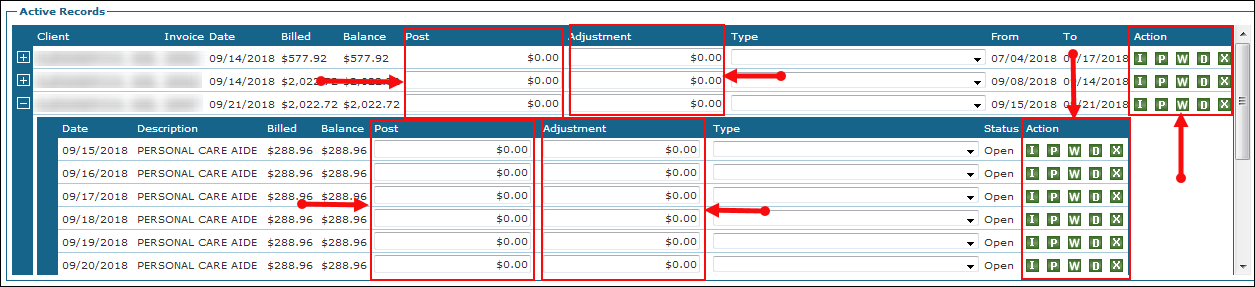
| 6. | Distribute the payment as necessary using the Active Records section. |
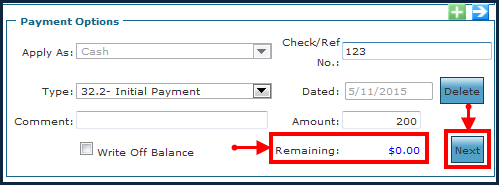
Post payments until the balance in Remaining: field in the Payment Options section is zero.
Note that the Batch Balance (Batch Options section) and Remaining (Payment Options section) fields decrease as each payment is posted.
The buttons in the Action column can be used to view, clear, or apply payments to the invoice/item:
| H. | I (Invoice Details): Clicking this button opens the invoice. |
| I. | P (Pay off Balance): Clicking this button applies a payment’s full balance amount. |
| J. | W (Write Off balance): Clicking this button writes off any remaining balance for an invoice/line item. |
| K. | D (Denied): Clicking this button applies a zero a dollar amount for an invoice/line item. |
| L. | X (Clear Current Row): Clicking this button clears payments entered for an invoice/line item. |
| 7. | Click Next in the Payment Options section to apply each subsequent check, if posting a batch payment. |
| 8. | Repeat steps as needed until the Batch Balance is zero, if posting a batch payment. |
Click Save to pause the posting session and return to it later. A user's saved session must be completed or discarded before beginning another session.

| 9. | Click Post Now to complete your manual remittance session. |
| M. | The batch cannot be posted until the Batch Balance is zero. |
| N. | Once committed, no further payment edits can be made. |
| O. | When prompted, print and/or save a copy of the Manual Remittance Queue report for future reference. |

Comments
0 comments
Please sign in to leave a comment.