Creating a Surplus Invoice
| 1. | Navigate to the Client Search screen. |
Main Menu > Client
| 2. | Select the applicable Search Filters to display the client(s) using surplus billing. |
| 3. | Click Refresh. |
| 4. | Select the client(s) from the search results. |
| 5. | Right-click to open a pop window. |
| 6. | Select Surplus Billing. |
 | Warnings: When generating surplus billing invoices for multiple clients, make sure to only select clients with the same Payor and Service. Only clients with the payor and service selected in the Surplus Billing screen are billed. |

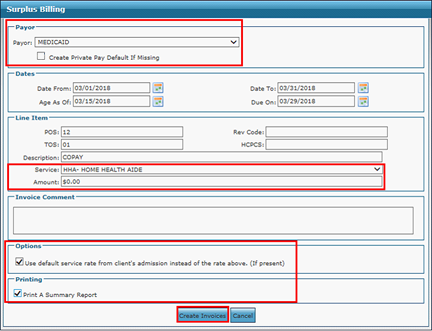
| 7. | Enter the surplus billing information. |
| A. | Payor: Select the client’s standard Medicaid Payor; do not select the surplus private pay payor. This field is mandatory. |
| B. | The Create Private Pay Default If Missing checkbox should not be selected. |
| C. | Dates: Select dates for all fields in the Date section. |
| D. | Line Item: Select the Service and enter a default service rate of $0.00 in the Amount field. If there is no copay set at the client admission level the amount entered in the Amount field will be default, the Service and Amount fields are mandatory. |
| E. | Options: Select the Use default service rate from client’s admission instead of the rate above. (if present) checkbox. |
| F. | Printing: Select the Print a Summary Report checkbox to view a summary report of the invoices created. |
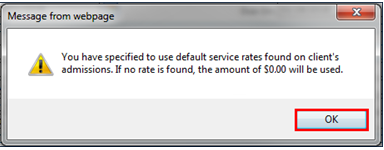
| 8. | Click Create Invoice. |
 | Note: Ensure the copay rates are always up to date in the client’s admission. |
| 9. | Click OK. |
| Note: If the Print a Summary Report check box was selected a summary report displays. This report is divided by payor. Each client’s claim is listed under the private payer. |
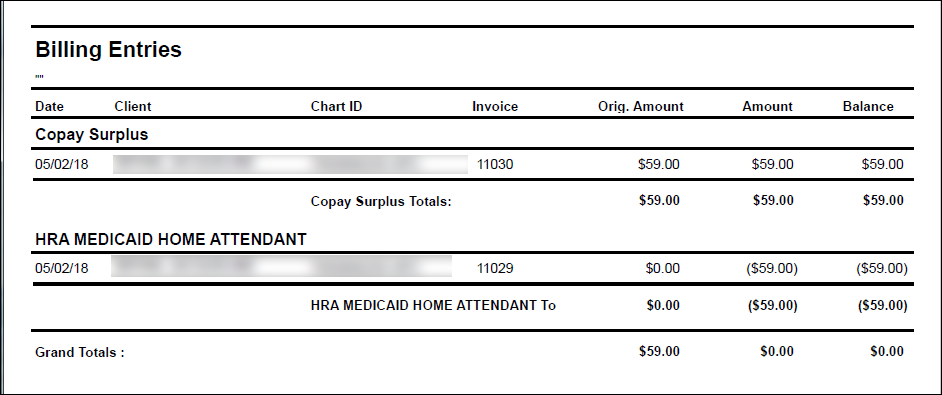
| Note: After the Billing Entries report is printed close the report and Surplus Billing screen. |
Comments
0 comments
Please sign in to leave a comment.